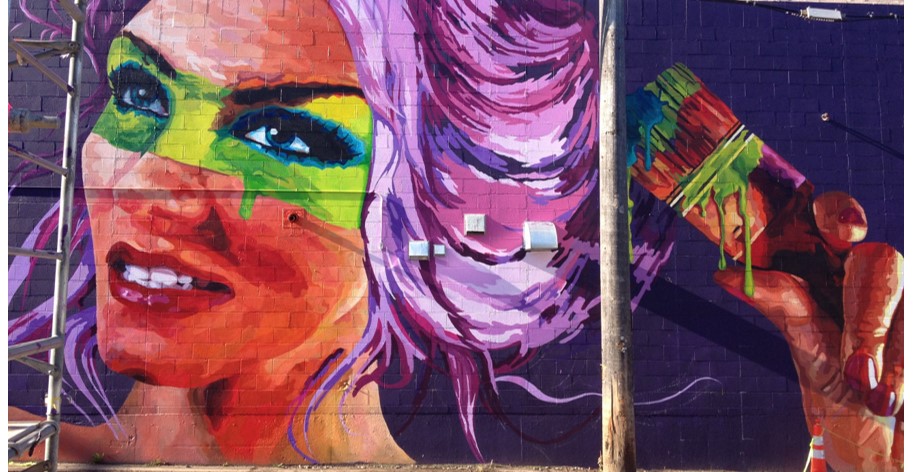
Murals bring art into the public sphere. Mural artists are often commissioned by public bodies to enhance buildings with colourful depictions of historical and daily life. In Alberta, towns and cities abound in murals — and there is room for many more. The Paint Spot has been helping mural painting artists for a long time and has amassed practical knowledge and mural painting tips, from the creation of, to the preservation of murals.
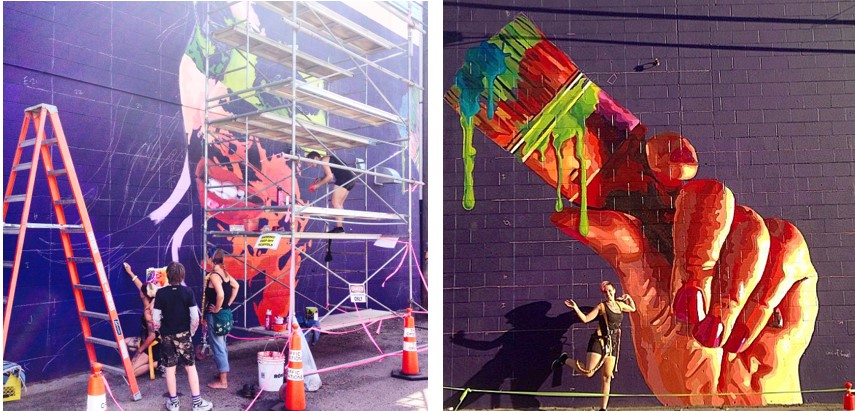
Varscona Mural in Edmonton created by Lacey Jane and Layla Folkman. Follow them on instagram: @laceyandlaylaart
Mural Painting Tips for Artists
Overview
Murals bring art into the public sphere. Mural artists are commissioned by public and corporate bodies to enhance buildings with colourful depictions of historical and daily life. In Alberta, towns and cities abound in murals — and there is room for many more. The Paint Spot has been helping mural artists for a long time and has amassed practical knowledge on the creation and preservation of murals. We can help the mural artist to plan, prepare, paint, preserve, and price murals. Mural Notes is designed to identify what you need to know. If you have further questions, the store staff will be happy to assist.
1. What Kind of Mural? — Interior or Exterior
2. What Kind of Paint? — Optimal Mural Paint
3. What Else is Needed? — Artist Supplies
4. Anything Else? — Hardware Supplies
5. Surface Preparation
6. Environment
7. Surface Protection
8. Maintenance
9. Working Out the Costs
10. Planning and community engagement.
A little history
Mural painting enjoys a long history in world art. Artists during Greco-Roman times murals used encaustic paint. Encaustic is a process of mixing pigments with molten beeswax and applied to plaster walls. Fresco, another early form of mural painting, usually involves the artist applying wet paint to wet plaster; drying binds the two together. Renaissance artists created huge works using oils on panels in their studios and then install them indoors elsewhere. Extant murals are mostly indoors, although you see outdoor murals, faded and chipped after many centuries, in old countries. Mural painting in more recent times are often acrylic. Spray paint is the most recent addition to the family of mural media, often inspired by graffiti art.
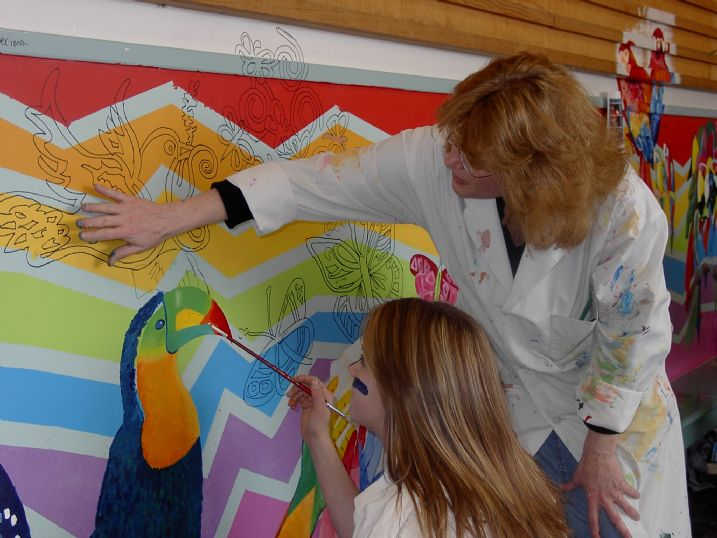
Mural completed by students at Allendale School Edmonton Alberta
1. What Kind of Mural? — Exterior or Interior
If your mural is indoors, you’ll probably be working on plaster (e.g., drywall) painted with interior latex or perhaps on unpainted brick. If your mural is outdoors, the surface you are working on might be brick, masonry, cement, latex painted, unfinished, new and clean, or old and grimy. When planning, preparing, and painting your mural, the qualities of surfaces become important considerations. Early in your thinking, it might be prudent to consider painting on panels rather than directly onto the surface at hand, especially if the wall you are working on is rough, dirty, patchy, or heavily textured.
When to use panels
What if a change of imagery is desirable in the foreseeable future? Panels are a viable option for temporary murals;
- If you are working with groups of children or others, panels can be a safer, cleaner alternative to working outdoors on ladders or scaffolding;
- If working conditions are too difficult (in a noisy or dusty area, for instance);
- If weather or other atmospheric conditions are severe enough to affect outdoor art adversely, endangering the mural.
- Panel murals use; birch, pressed wood, particle board, or metal. MDO (medium density overlay) plywood is a good bet. See Section 4 for more detail on panels.

Mural by Tim Heimdal on the Old Strathcona Performing Arts Centre 8426 Gateway Boulevard Northwest, Edmonton
In the field
The field experience of artists who have painted murals may help you choose between working onsite and working on panels — “A rough plaster wall will require more preparation. It will use more paint and varnish. It will also wear out brushes quicker.”
“Masonry walls are known to crack and deteriorate over time. The mural may suffer the same fate and require extensive repairs.”
“A mural painted on 4×8′ panels can be relocated anytime, or can be removed for wall repair. It will not be damaged if the wall cracks or seeps water.”
“Scaffolding rental will be minimized if the mural is done on panels rather than directly on the wall.”
“It is quite difficult for an artist to paint and create while high on a scaffold, standing less than six feet from the wall, in what will often be hot (or cold), rainy or windy weather. For these reasons it could require about twice as long to do the same work.”
“Artists will be more likely to guarantee their work if they can do it under familiar and comfortable conditions, on a surface they know.”
“The artist can work much more efficiently on panels in his or her studio. They can paint in known conditions, night or day, in any weather. They can even work on the project all year round.”
“If painted on panels in a studio, the project can be overseen by progress inspections done in the artist’s studio, or the artist can mail photos, post digital pictures on the web, or mail dvd’s.”
“Panels can be transported and displayed in various locations before the final installation. Some groups take advantage of this for publicity and fundraising opportunities.”
One caution about panels
“Be very careful in handling and shipping completed panels: do not allow painted surfaces to touch one another as they can adhere, can pull paint off, even if varnished.”
In short, panels are generally preferable to other surfaces for mural painting, especially outdoors, because of their ease of preparation, handling, painting, and preservation. Exercise caution in transporting and installing panels.
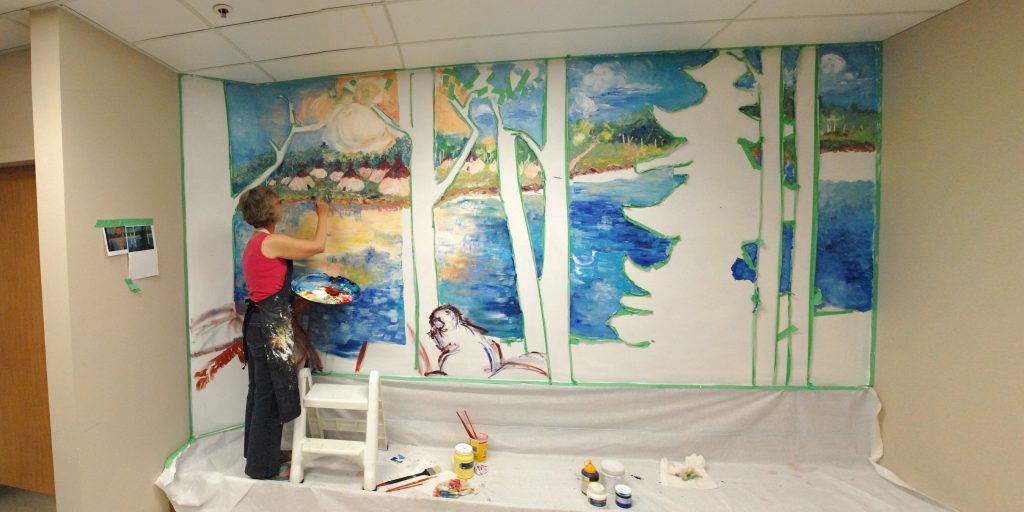
Artist Nancy Corrigan working on an interior mural.
2. What Kind of Paint? — Optimal Mural Paint
Murals are large paintings, and it may be tempting to choose latex house paint rather than artist-quality paint, particularly when considering paint costs or thinking about covering large areas with one single colour. Latex certainly will cost less to buy in large amounts, but the long-term costs can end up being higher, not just in terms of money spent. Artist-quality paint includes acrylics and other paints found in art supply stores. These materials are formulated for brightness, purity of colour, longevity of surface integrity, and lightfastness, making the best choice for mural painting, chiefly because:
Artist-quality paint is more durable. Artist-quality paints last for generations, unlike house paint which is formulated to last a few years. Pigments used in artists’ materials are lightfast, (the paint will neither fade nor darken), and the binder, which provides paint particles with cohesion and consistency, aren’t susceptible to cracking or peeling. Properly treated, a conserved mural in artist-quality paint, even one facing north in this northern climate, can last a quarter century or more. Artist-quality paint’s colour range is superior.
Mixability is enhances a brighter, richer palette. By mixing a few basic colours the muralist can create hundreds of hues. Household latex, by contrast, is not so rich, owing to the fillers and opacifiers used in their manufacture to lower costs. Neither is it so versatile.
Quality equals longevity
Use artist-quality paint with additives or mediums to create effects and to extend the pigment without jeopardizing the integrity of the paint film. In the past, some towns used house paints for their murals with the intention of bringing the original artists back every few years to ‘touch them up’, and making this ‘correction session’ a tourist attraction in itself. However, they found that this was neither viable nor economical after all. They discovered that the faded areas were more extensive than expected, and the cost and inconvenience of engaging the artist, removing the protective coatings, repainting as necessary, and then refinishing the artwork, not to be viable. The process was repeated every 5 to 8 years.
Oil vs Acrylic Paints?
Oil paint is suited to indoor work, specifically on wood and canvas panels. It’s slow-drying and may tend to pick up dust and dirt from its surroundings. In fact, drying and curing time for oils is 4 to 6 months, and many projects can’t wait that long. It is a medium that requires specific practical knowledge about its use; the indoor muralist who chooses to use oil paint ought to have an extensive knowledge of its properties before making a commitment to it.
Oil paint isn’t recommended for outdoor art and mural painting. It continues to oxidize, becoming harder, more brittle, and less flexible over time. Oil paint does not breathe. Moisture cannot be transmitted away from a painted wall if it becomes wet. The oil-painted surface requires more attentiveness and protection than is practical in an outdoor setting.
For durability and weather resistance, artist-quality acrylic paint is most often the outdoor muralist’s medium of choice. (Acrylic is equally at home indoors, too.) Acrylic paint is best for outdoor surfaces; brick, cement, and panels. Using Golden Artist Colors as our example, we can list several options for the muralist working with acrylics:
Heavy Body
The relatively thick paint that is familiar to acrylic artists, is available in tubes and jars. More than 100 tints are listed in Golden’s Heavy Body Tint Chart. That’s a huge range of colour choices. To extend Heavy Body paint, and thin its consistency for ease of brushing (especially useful if your support has a rough surface, like brick or cement) add GAC 200. GAC 200 is one of Golden’s additives, designed to increase adhesion, paint film hardness and strength. Golden recommends it for use in outdoor murals.
Fluid
Pigmentation in fluid acrylics is similar to heavy body paint, but it’s available in fewer tints. What if you’re used to working with liquid paint? Does your surface require flowing paint for coverage? Golden Fluid is a good choice. “When mixed with Golden Airbrush Medium, the Fluid Acrylics perform very well for airbrushing, offering the artist still further choices in color selection” (Golden Artist Colors website).
Airbrush Colors
Airbrushing is a good way to create thin, luminous but tough paint skins. Golden recommends using its High Flow paints with Transparent Extender – the additive increases durability. Airbrush artwork has a distinctive, smooth surface, and the fine pattern of paint droplets allows for certain effects that are difficult to obtain otherwise. Airbrushing may be a logical choice, depending upon your themes and desired effects. When it comes to colour choice, lightfastness is a consideration for both indoor and outdoor murals. Manufacturers rate pigments for lightfastness and permanency. Use colours with the best rating. Try to avoid low-rated colours. Try to avoid using cadmium outdoors. It’s expensive, and will fade quickly.
For the mural artist whose background is visual art, acrylics will probably the easiest, most familiar and most pleasing paints to use. Some industrial-type paints form a permanent bond with brick or concrete, but the pigment must be mixed in onsite. They are time-consuming, expensive, and demand practical experience in their preparation and use. Commercial enamels will probably not be as satisfying as artist-quality acrylics,either.
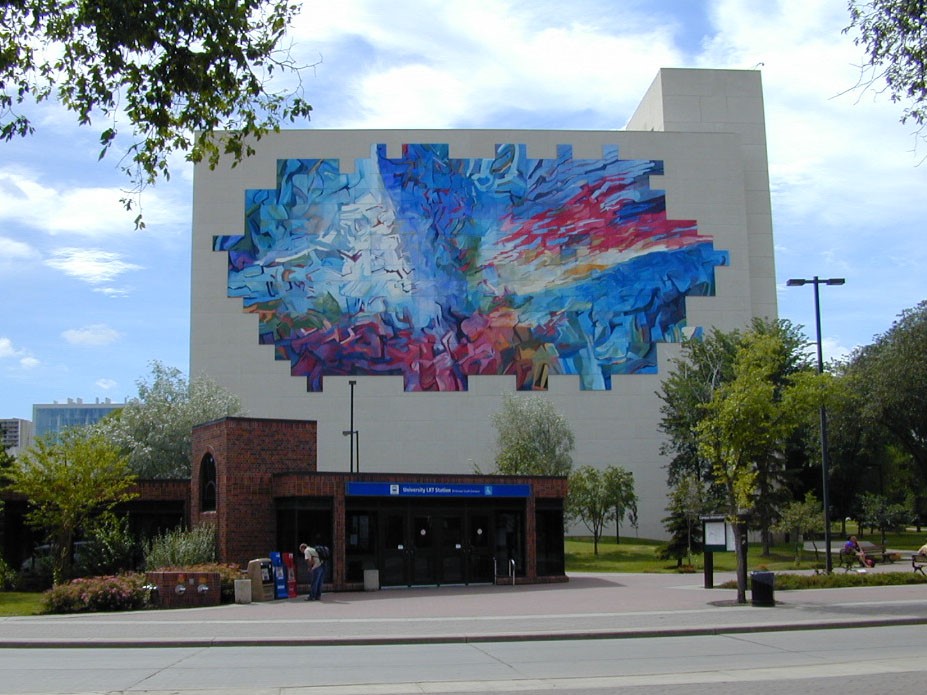
West and North, Norman Yates’s mural on the Education North building, is one of the most recognizable landmarks on the University of Alberta campus.
Oil VS Acrylic Based aerosol paints
Urban art is another source of mural materials, both images and paints. Aerosol or spray paints, originally used in ‘outlaw’ graffiti, are available in oil and acrylic bases, in many colours, in art supply stores. The Paint Spot carries Montana Gold and Black lines, and Lopp both of which come in myriad of colours.
Both oil and acrylic-based aerosol paints are used outdoors in mural painting. Safe use includes masking your face against the paint spray, which includes pigment in fine dispersion and chemicals. That goes double for using the indoors. Because the spray is fine and unhealthy, safety measures are mandatory. If you are considering making reference to urban art styles, aerosol paint is well worth considering. It does require practical knowledge, since the handheld can of spray paint is very responsive to hand movements. According to Wikipedia’s article on aerosol paint, “A wide array of actuators, or caps, is available, from standard ‘skinny’ caps to wider ‘fat’ caps, as well as caps that control the softness or crispness of the spray. Calligraphy caps create fan spray instead of the standard round.” Stenciling is also a means of creating aerosol images.
Go for bold!
Artists engaged in street art, urban art and graffiti, or working with youth, might consider the bold, vibrant, fluid imagery that aerosol offers. Aerosol paint works on a variety of surfaces, which makes it worth considering when working on an existing outdoor surface. Current information about the longevity of either the oil or acrylic-based aerosols in mural painting is scarce. Rogue graffiti provided the motive for devising tools devised for removal. So, varnishing a finished mural is a must. See Section 7 for tips on varnishing and protecting murals .

The grand opening of the Open Source Street Art or “Free Wall” behind The Paint Spot 10032 81 Avenue Edmonton AB.
3. What Else Do I Need Before Painting?
If you are using acrylic paint for your mural, you will need to get some additives.
Use GAC 200 with Golden heavy body acrylic to improve flow and strengthen the paint film. You’ll need Airbrush Medium is added to Fluid Acrylics to make them suitable for use with an airbrush.
According to Golden’s website: “Airbrush Transparent Extender can be blended with Golden Opaque or Transparent Airbrush Colors in any ratio desired, allowing artists to precisely control of the transparency of the colors. These attributes are very important for techniques such as shading and smooth gradations. Airbrush Transparent Extender can also be used with any of the Golden Heavy Body [or] Fluid…Acrylics. When the mixture of paint and Airbrush Medium exceeds a ratio of 1:2 or more, the Extender can be added to further thin and extend. This will keep the retarder level balanced for a quicker drying film, without sacrificing sprayability.”
It is likely, then, that you will be able to make good use of the above variety of Golden additives and mediums, whether you are using Heavy Body, Fluid or Airbrush Golden paint.
Mural Notes refers to Golden products most often for several reasons, one of which is the tradition Golden has built of participating in mural painting, and another is the extensive information Golden makes available to the mural artist about almost every aspect of mural painting. Further information about Golden products is available from the Golden website, www.goldenpaints.com.
Besides paint, the mural artist may need sketchbooks, drawing and painting tools, even a projector or an airbrush kit, in the course of planning and creating a mural. Think: Large brushes! Don’t forget the protective varnish we discuss in Section 7.
4. Anything Else? — Hardware Supplies for Mural Painting
Suppose you have chosen to use plywood panels for your mural. You will need to purchase your wood, primer, edge sealer, and application brushes and rollers from a hardware or lumber store. The preferred plywood is MDO, or medium density overlay, one brand of which is Crezon® (further information on this brand is available at www.greatnorthernlumber.com. MDO’s strength is in its construction, its finish, and its durability. Achieve a smooth surface with good tooth by priming clean, dry MDO with a primer designed for waterborne acrylic paint.
This advice relates to indoor or outdoor murals. You can prime your mural with gesso, as you would for a painting on panel or canvas, if yours is an indoor mural; gesso is available at artsupply stores, rather than hardware stores. The prime coat is the most important coat – the surface should be clean and dry before painting. It’s the only suface preparation required. Do not apply too thin a prime coat. The prime coat should yield about 1 mil dry film thickness. Apply within the spreading range recommended by the manufacturer to obtain proper thickness. — www.greatnorthernlumber.com
Brushes
Think big! Use big synthetic brushes for all your mural painting needs, indoor or outdoor. They last longer than natural hair brushes (not used for acrylic paint). They are also easier to clean, and give better, crisper edges to your lines.
You should also seal the edges of each panel with two coats of edge sealer to prevent water from seeping into the wood. Don’t underestimate the importance of priming and preparing a surface before painting. Your paint will perform properly only on a well-prepared surface, and sealing all edges is a practical preventive measure.
If you are painting on surfaces other than new, clean panels, you will need to get supplies for cleaning and preparing them. Cleaning, destroying mold and mildew, and filling cracks and grooves – if needed – require various approaches, depending on the surfaces themselves. The next section summarizes procedures you may need to undertake to prepare
your surface. Again, if you are painting new, clean MDO panels, priming the surface and sealing the edges is all you need to do before you begin to paint.
Consider insurance when you use scaffolding and ladders.
Scissor lifts make work easier but require experienced operators. Check with your community regarding lane or road closures.
5. Surface Preparation
Cleaning and creating a good ground If you are not working on prepared MDO panels, you will have to ensure that the surface on which you are working is both perfectly clean and absolutely dry. Don’t under-prepare your surface, as problems with proper bonding between your paint and the old surface may reappear later: mould may return, sticky grime may emerge through your paint, and peeling may recur. If you power wash your surface, allow it to dry for about a week before proceeding to prime.
What follows is a brief summary of some means to prep your surface before priming. More specific and detailed information is available through a Web search of particular surfaces and problems.
Indoor painted wood
Test to see if the paint is oil or acrylic based by scrubbing a small patch using cloth wetted with isopropyl alcohol. Oil colour won’t transfer, but acrylic will. Wash with soapy water, rinse thoroughly. Prime dry wood with a good latex primer or gesso, as for panels. Abrade enamel (alkyd) paint with sandpaper to give the surface sufficient tooth prior to priming.
Concern yourself with the nature of the surface
Consider the kind of paint and its physical condition. Painting over an existing coat is never as permanent as a stripped and freshly coated surface. If the paint is a water-based polymer, chances are good that the GOLDEN paints will adhere sufficiently. Always abrade or remove a high gloss oil paint. If the existing paint film is deteriorating, then it is best to have it removed (sandblasted, power-washed, scraped, etc.). It is critical to wash any painted surface, even a newly painted surface, with soap and water prior to application of acrylic products. A major coatings manufacturer states that as much as 80% of all coatings failure can be directly related to insufficient surface preparation.
Outdoor unpainted wood
Prime clean, dry unpainted wood as soon as possible. Ideally, temperatures are between 18 and 24C, not lower than 10C, and never if it is rainy or foggy. Sand and spot-prime knots. Mend cracks and splits with acrylic caulk before spot-priming. Follow with wood primer or gesso.
Painted wood
Remove loose, peeling paint; sand rough patches smooth. Use commercial cleaners and detergent solutions to clean deposits of dirt, grease, and oil. Power washing is another option. Remove mould and mildew with bleach or appropriate commercial cleaner. Take precautions: wear rubber gloves, protect eyes, avoid getting on skin. Never mix bleach with any substance with ammonia content! Abrade, use household abrasive cleaner or liquid de-glosser on glossy surfaces, and clean well with soapy water. Always rinse thoroughly and allow surface to dry completely before continuing.
Bare masonry
Treat clean, mature masonry with masonry conditioner. Any porosity reduced will block filler before priming with latex primer.
Painted masonry
Take off loose material, power wash; check that surface is clean of grease, oil, and waxy, resistant substances; scrape away old coatings, then abrade by sanding or sand-blasting for good adhesion. Special primers from industrial paint suppliers may make sandblasting unnecessary yet provide a good bondable surface.
Metal surfaces
All metal surfaces also need to be completely clean and roughed lightly for paint adhesion. Each metal requires specific treatment. If you are painting on metal, check the Web for information pertaining to prepping the specific metal, e.g. aluminum, steel, etc.
Brick
Brick, especially old brick, tends to be absorbent. Use masonry conditioner on brick surfaces. Golden’s GAC 100, mixed with water at a 2:1 or 1:1 ratio, will seal the surface. If there are doubts about how to prepare any surfaces or about what sort of materials to use on them, consult with experts before you begin. They will have current information about products and suggestions on how to use them. They will understand the kinds of problems you may encounter with the kinds of surfaces you are covering.
6. Environment
Even indoors, consider temperature and humidity when painting. Work in a space that is temperate and dry. Your work will thrive, and you will be comfortable, too. Oil paint, if you are using it for an indoor mural, is easier to apply at moderate temperatures, and it dries best in a space with warmth, sunlight and fresh air. Avoid painting outdoors when the weather is humid or wet. Relative humidity hinders drying, so try to avoid working in relative humidity over 70%. Paint films cannot dry well if the weather is cold; again, avoid working in temperatures lower than 10C. Temperatures higher than 24C will also affect paint: drying times will be sped up. Climatic extremes during application can result in less stable paint films.
The Golden website advises: “Avoid painting in adverse weather conditions, such as rain and fog. This addition of moisture can affect the drying times and will re-introduce water back into recently dried paint films. It is especially important to allow proper drying/curing time between the isolation coat and the varnish layer. Trapped moisture can severely hinder adhesion, and can cause clouding of a clear layer. Oh, and give your project sufficient drying time washing, priming primer, or conditioner coats. Architectural coating manufacturers recommend waiting 30 days after washing concrete and cinder-block surfaces under normal drying
7. Surface Protection
Once you have completed your mural you will want to ensure its safety and longevity by protecting its surface. Do not leave your paint surface exposed to weather, the sun’s rays, pollutants, or graffiti. Provide your mural with a protective, resistant coating.
First, apply an isolation coat
“An isolation coat also develops a thicker layer of acrylic, which will give better protection and durability and serves to unify the acrylic paint layer” (Golden website). Golden recommends a 2:1 mixture of GAC 500 with Transparent Airbrush Extender if you are spraying on your isolation coat. If you are using a brush, it recommends a 2:1 mixture of Soft Gel Gloss to water. Allow the isolation coat to dry for 2 to 5 days, and then apply varnish. You have a couple of choices to consider:
A. Apply an artist quality varnish, such as Golden Mineral Spirit Acrylic (MSA) varnish, which has UV (ultraviolet light) protection, to keep colors fresh. MSA varnish “provides a tough, durable surface that increases resistance to moisture and pollutants. …[It] is removable in mineral spirits, turpentine and various aromatic solvents, which is a
useful property for either graffiti removal or maintenance purposes. Spray application is recommended (1-3 coats)”
(Golden website).
OR
B. Apply a solvent-based polyurethane coating. These form tough, durable protective layers over acrylic paint. They are not artist supplies. Research them further by visiting the manufacturer’s site and online for artists’ reviews. Varnish can be removed and renewed as needed over time.
NB: Application of a varnish such as Golden MSA varnish or commercial polyurethane will seal the mural’s surface. When the mural is on a masonry wall, breathing space ought to be left at the edge, so harmful gases or moisture gets trapped behind the paint film.
8. Maintenance
Inspect your mrual for integrity once or twice each year, especially in spring. If any visible failure of the coating varnish becomes noticeable, such as cracking or flaking, remove the loose flakes, then apply a fresh coat of varnish. For panel murals, pay particular attention to their edges, looking for loose or cracking paint. When cracks are minor, a new application of varnish will consolidate the protective film without the need to remove existing coat.
If the mural needs cleaning to remove accumulated dust, simply wash by hand with a mild, gentle soap (no ammonia), warm water and a sponge. Don’t use a pressure washer; avoid mineral solvents. In the event of graffiti, cleaning can be done, but is best done by or in consultation with an experienced person, such as a conservator.
Care for the paint surface is paramount. The Canadian Conservation Institute has a very thorough, downloadable form for tracking reporting on the condition of outdoor murals in Canada. A wise artist creates an agreement with the commissioners of the mural regarding its maintenance. A dated document that includes all the materials employed in the mural should be kept on file by both the artist and the commissioners.
9. Working Out the Costs
We hope The Paint Spot’s Mural Notes provide useful information when you come to setting a mural’s budget. Pricing out the paint cost for a mural is tricky because it depends on your painting style. A thick impasto style will use more paint than a thin wash style. Painting on location will require more paint, owing to paint loss/waste through its drying on palette.
Group projects can use more paint than expected. Many artists have offered opinions about paint usage. Their experience suggests that budgeting for grounds, colours, mediums, isolation coats, and varnishes should be set at about $2 to $3 per square foot.
Brushes, rollers, drop cloths, and scaffolding, should you need them, are extra to this sum. One experienced and frugal painter created a 14×112 foot mural using Stevenson acrylics for only $650 net. The math works out to $0.42 per square foot. Normally, she budgets about $300 to $400 for paint only to create a 10×20 foot mural (approximately $1.75 per square foot).
Tim Heimdal’s 1995 mural in Old Strathcona worked out to be $2.41 per square foot (15×10 foot for a total of $2170), including grounds, acrylic paint, isolation coat, and varnish. Average paint coverage is the same for gesso, paint, isolation coats and varnish. Consider about 100 square feet per liter. Most paint companies suggest a gallon covers about 300 square feet. Remember larger murals mean more paint, and more paint means better discounts. Ask about our discount policy!
The “Free Wall” behind The Paint Spot 10032 81 Avenue Edmonton AB provides a large wall for urban artists to practice and document works for their portfolios. You can see work in progress nearly any sunny day year long.
10. Be sure your planning includes community engagement and fundraising. More to Read
Golden Artist Colors website provides a very complete technical guide: Painting Exterior Murals
See how The Paint Spot created the six murals on the side of our building: #PaintSpot6 Mural Process with Videos
Download a PDF of this tip sheet
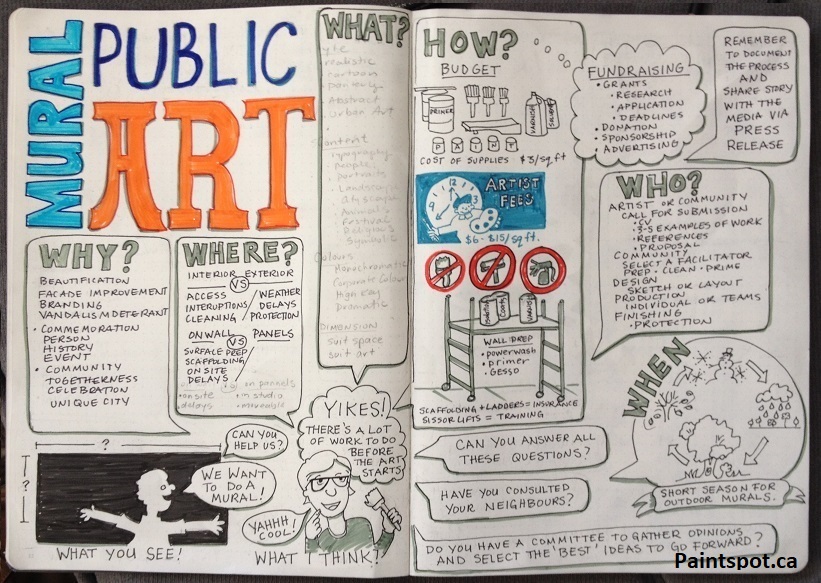
Below is a cartoon of a mural thought process. Often the planning, preparation and fundraising takes more than a year. Be patient; lots goes on behind the scenes.
_________________________________________
Kim Fjordbotten (August 2019) As the owner of The Paint Spot, Kim Fjordbotten is passionate about helping artists use materials and make art. She is available as a speaker and educator for teachers and art associations. The Paint Spot offers exhibitions, workshops, and beautiful art materials to inspire your creativity.
Notice you are not bombarded with advertising while sourcing this information. Please help us by purchasing your art supplies from The Paint Spot. We really appreciate your business and it means we can keep making educational posts for free. Thank you.

