Encaustic painting material is composed of natural beeswax and pigment; damar resin is most often added, sometimes other waxes or oil paint, too. Molten encaustic, applied to a surface, is fused by applying even heat to create a lustrous, enamel effect. The waxy, semi-translucent natural colour of beeswax imparts an exquisite visual property. Encaustic can be created in thick layers for appealing tactile effects. It is very durable, since wax is impervious to moisture, and over time will retain all the freshness of a newly finished work.
Painting with wax means painting with a melting colour.
A little history of encaustic painting
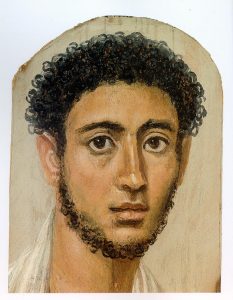
The history of encaustic includes paintings on the sides of Greek and Roman ships, Pompeian frescos, as well as the Egyptian Fayum portraits on sarcophagi (100-300 AD). Many of these paintings still exist and have held up beautifully over time. Although its history goes back more than 3000 years, encaustic is so versatile that, in recent times, it has achieved popularity as an unusual alternative to oil and acrylic paints. In the 1950s, for example, modern master Jasper Johns used the medium to create his iconic flag and target paintings.
Whether they work in contemporary or traditional styles, what attracts modern painters to encaustic is the spontaneity and variety. This traditional medium has increased in popularity at The Paint Spot too. By popular demand, we stock R&F Encaustics and Enkaustikos Hot Sticks, as well as waxes, encaustic gesso and boards, and a variety of encaustic tools.
Encaustic painting processes
The process of working with encaustic is personal and experimental. It may consist of brushing or pouring on countless layers of wax, or scraping away or carving into the wax, inscribing text or marks, as well as painting with oil paints or oil bars, drawing or transferring marks or images on top of the layers. (Charcoal transfers work very well, capturing the artist’s gesture and the characteristic texture of charcoal, without smudging.) Lay on delicately thin glazes or super thick encrusted impastos. Embed images between the layers of wax. The adhesive quality of encaustic paint make lend toward collage techniques. Try adding foils, paper, glitter, string, or found objects, for example.
Supplies
A mixture of common and specialist supplies are used in encaustic painting. Electric griddles and frying pans can serve as palettes; a specially designed encaustic palette is also available from R&F. A hot palette provides a platform on which to keep knives and brushes warm and ready to use. Some artists melt colours directly on the palette, but is it better to keep them separated in cups or muffin tins. Use natural hair brushes: synthetic brushes will melt. Artist have an assortment of common tools available to create distinctive marks; palette knives, carving knives, razors, spatulas, scrapers, modeling tools, dental tools, etching tools, electric irons or Encaustic Art brand encaustic irons, and found objects. We also have R&F heated spatulas with temperature regulators and interchangeable tips.
Which supports for encaustic painting?
Supports for encaustic painting are rigid; wood, heavy card, rag museum board, heavy printmaking paper, watercolour paper, and raw canvas, if mounted onto a rigid support. Do not use acrylic gesso or oil primer. These grounds are not porous enough for the purpose. If the support itself is porous, and you like the color of it, no ground is necessary. You may want to apply a coat of plain beeswax so your first layer of colour doesn’t completely soak into the support. R&F makes an encaustic gesso if you want white ground.
Some more tips
Encaustic paintings are completely safe under normal temperatures. Only direct heat or temperatures in excess of 13o degrees Celsius may begin to soften the wax. Indirect sunlight is acceptable, but, of course, direct sunlight is not ideal for paintings of any medium. Clean encaustic gently with a soft cloth such as cotton.
Encaustic is verstatile. Try leaving encaustic paint rough and matte, or worked to a semi-gloss or lustrous high-gloss, enamel-like finish. Artists can add additional layers within minutes because encaustic paint cools quickly. Once a surface has cooled, the paint has reached a permanent finish. A process called fusing finishes an encaustic painting. Use a heat gun to melt together and unify layers. Try buffing a finished encaustic painting for a more polished look. A painting can be revised and reworked at any time – whether seconds later or years later.
Close-up images of popular encaustic painting techniques covered in our art classes
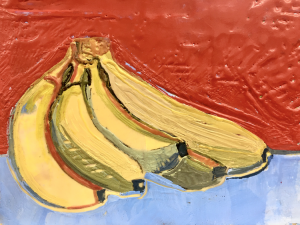
- Paint directly with melted wax from a heated palette using a natural-hair brush like hog bristle or goat hair that has also been warmed on a palette. This method creates a textured surface that will soften slightly when the layers of colour are fused with the heat gun. If you do not fuse, the layers of colour might not bond well, and flaking or cracking may occur. The image below was created by Jordan Pearson as a demo in an introductory encaustic class.
2. Graphite and charcoal
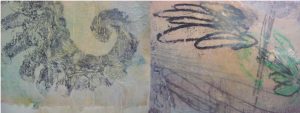
Try transferring graphite and charcoal drawings to warm wax. Simply draw your image on a piece of paper, any scrap paper or copy paper will do. Then place the image face down onto a warm layer of wax. Do not put it on a hot surface. It will be too sticky. The paper will stick with your drawing. On a warm layer of light-coloured or clear wax the image will show up clearly. On a darker surface, the image will be more subtle. During the fusing process the drawing material will sink into the surface slightly. It is quite fun to watch the melting wax coat the dry material. The image is liquid when hot so air from a heat gun or tipping the surface may warp the image for some interesting effects too. These images are details from demo paintings by Kim Fjordbotten.
3. Texture
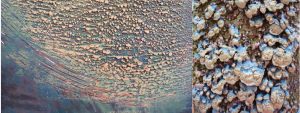
Texture happens naturally with layers of encaustic. Using a stiff brush and nearly cooled wax will exaggerate the texture faster. Wait until the layers gently fused. The image is a close-up detail of a demo by Kim Fjordbotten.
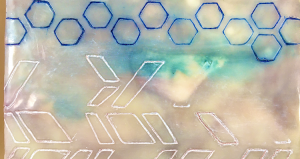
4. Scribing and polishing
When the wax is cold and hard, use a lino-cutting tool to gouge or scribe into the surface. Then rub an oil stick into the crevice. Polish the art to clean off the excess oil stick colour. The colour will remain in the groves and make the marks crisper and more pronounced. Detail of a painting by Michelle Chapman.
5. Embed objects
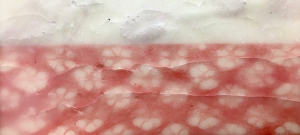
Wax is excellent for embedding thin objects. The matte and cloudy effect of wax can produce some atmospheric mystery. Artist Michelle Chapman layered Japanese tissue on wax, then brushed another layer of warm wax on top, fusing the layers together. To avoid cracking make sure your encaustic is on a rigid surface like a panel or board. This is a store sample, cracked from being dropped too many times. Detail of a painting by Michelle Chapman.
More…
Tip: Oil painters may simply be interested in Gamblin’s Cold Wax Medium; when added to oil paint, it creates an encaustic effect. It is also useful as a final, protective layer on oil paintings. Without buffing, it looks quite matte, with buffing, it becomes satin. Never melt or heat Cold Wax Mediums – they’re not used in encaustic painting.
Tip: Acrylic painters seeking to simulate the look of encaustic could try Golden Soft Gel Semi-Gloss. This gel will cause brushstrokes to level and simulate the cloudy, atmospheric visual effect seen in wax.
Check our class listings for upcoming encaustic classes.
_________________________
Kim Fjordbotten: As the owner of The Paint Spot, Kim Fjordbotten is passionate about helping artists use materials and make art. She is available as a speaker and educator for teachers and art associations. The Paint Spot offers exhibitions, classes, and beautiful art materials to inspire your creativity.
Notice you are not bombarded with advertising while sourcing this information. Please help us by purchasing your art supplies from The Paint Spot. We really appreciate your business and it means we can keep making educational posts for free. Thank you.
