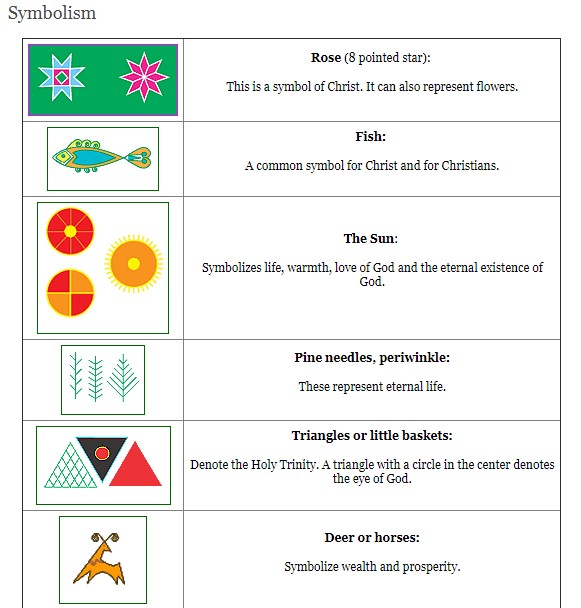
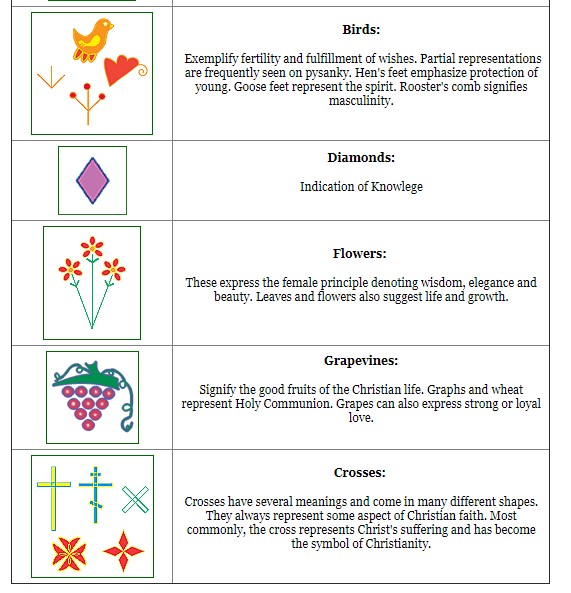
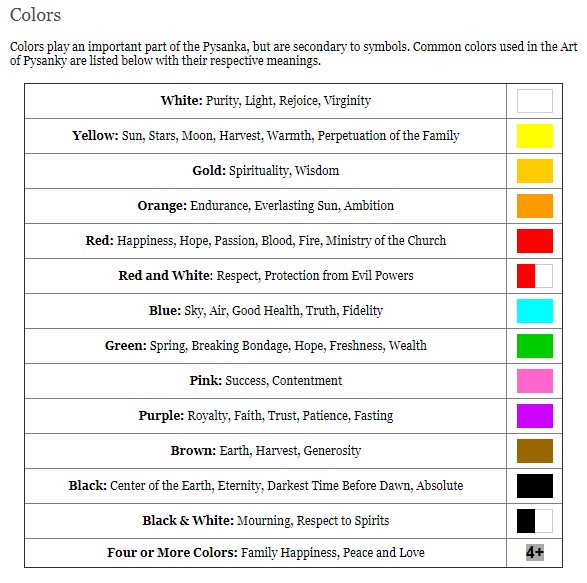
Layers of beeswax and dye are used to create beautiful designs on Ukrainian Easter Eggs. Generations of Ukrainians handed down the tradition of Easter egg decorating. They are famous the world over for their colorful Easter Eggs (Pysanky). More than 2000 years ago, before the time of Christ, people decorated eggs believing that great powers were embodied in the egg. Eggs symbolized the release of the earth from the shackles of winter and the coming of spring with its promise of new hope, new life, and prosperity. With the advent of Christianity, Easter eggs symbolize the Resurrection and a promise of eternal life. Legend has it that as long as pysanky are decorated, goodness will prevail over evil throughout the world.
The process
First, apply melted wax to the eggshell. This hot beeswax will harden almost instantly. The beeswax covers and seals the shell, which repels the dye. Applying the wax requires a special tool – a kistka.
Apply the first layer of beeswax on a white shell. Follow this with the first dip in dye. Ordinarily, the sequence of color dips moves from the lightest color to the darkest color.
Start with the white shell first. Apply melted beeswax to the white shell wherever you want white on the completed design. The beeswax seals the color underneath it. The next step is to dye the egg with the first color. The entire shell will change color, except underneath the beeswax. That part of the egg will remain white. As a rule, the first dye used will be yellow. Now, cover whatever part of your design that is to be yellow with melted beeswax. Dye the egg again into the next color, usually orange. Apply more beeswax. Dye the shell again. Repeat a few more times until you have finished layering all the colors of your design.
Order Your Psyanky Supplies Today
Here are some design tips from our supplier.


